Creating a Banner with StickyCTA
In this section, we will explore how the WordPress StickyCTA plugin enables the implementation of an effective fixed banner on your site to draw visitors towards your offers and services.
Before we begin, here are some reminders about the terms that will be used:
Sticky: means adhesive, used here to refer to a banner that remains fixed on the screen even when the visitor scrolls through the page.
Banner: refers to the entire creation using the StickyCTA plugin, including the call to action.
Call to Action (CTA): this is the clickable button in the banner, also known as the action button.
Creating a New Banner
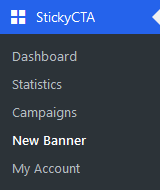
To create a new banner, simply go to the StickyCTA dashboard and click on “New Banner“.
There is also a shortcut in the plugin menu.
Now that you are on the page to create your first banner, let’s explore the different settings and features available.
Note that StickyCTA allows you to preview the changes you make to your banner live (this option can be disabled at the bottom of the page).
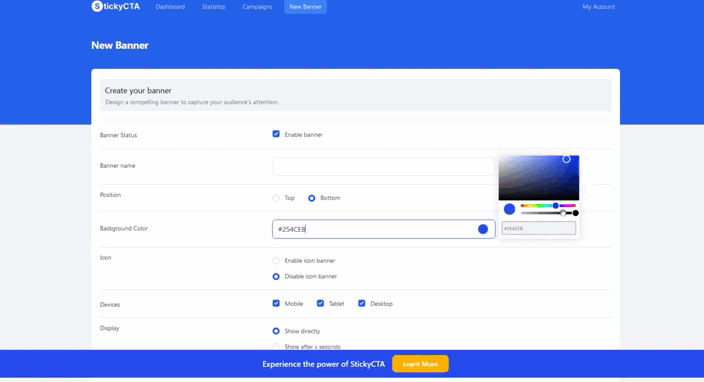
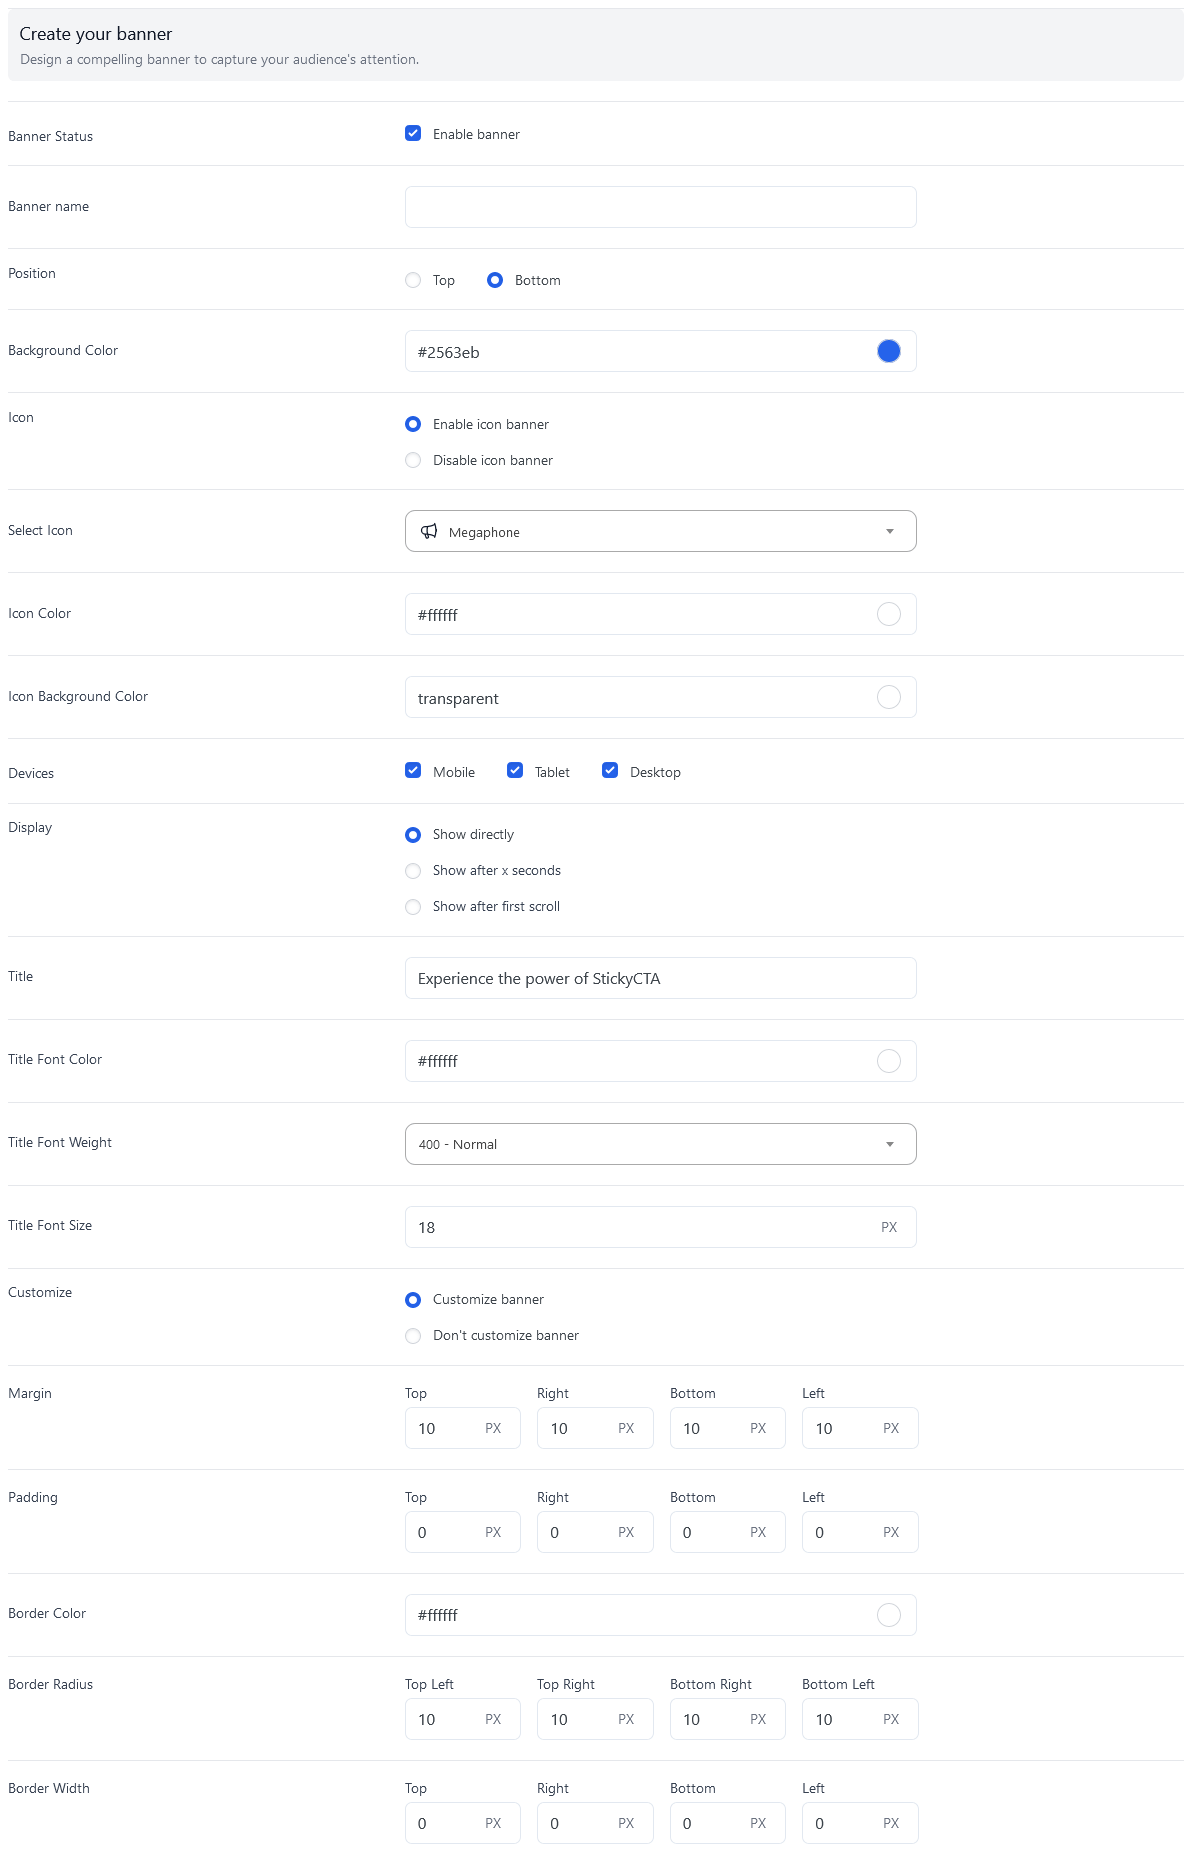
Create Your Banner
This section allows you to customize the background color, text, and general appearance of the banner.
Customization of the call to action button (CTA) will be covered later.
Banner Status: enables or disables your banner.
Banner Name: allows you to name your banner for easier identification in the dashboard or statistics. Remember to include specific information, especially the main color used.
Position: allows you to display the banner at the top or bottom of your site.
Background Color: by default blue, you can customize this color using the palette.
Icon: choose whether to display an icon in front of your banner’s catchphrase.
Select an Icon: choose an icon from the library.
Icon Color: set the icon’s color.
Icon Background Color: choose the background color for the icon.
Devices: select if you want to display the banner on all devices (computer, tablet, mobile) or if you want to customize this selection.
Display: choose how the banner displays, with 3 options:
- Display immediately
- Display after X seconds
- Display on the first scroll
Title: set the text that will appear on your banner.
Title Color: choose the color of the title.
Title Thickness: adjust the thickness of the title.
Title Size: adjust the size of the title.
Customize: further personalize your banner with the following options.
Margins: modify the margins.
Inner Margins: adjust the inner margins.
Border Color: choose the color of the border.
Border Roundness: set the size of the border roundness.
Border Thickness: choose the thickness of the border.
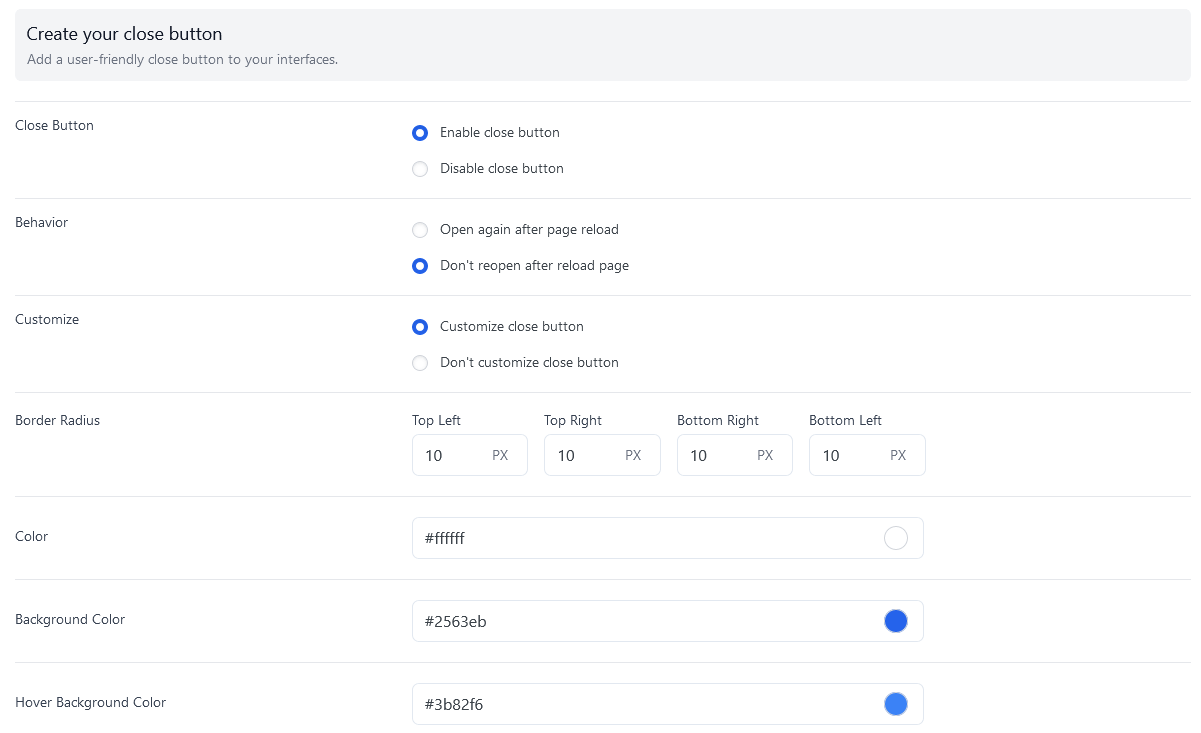
Create Your Closure Button
You can decide whether site visitors can close your banner or not. StickyCTA offers several possibilities.
Enable or Disable Closure Button: choose whether to display the closure cross.
Behavior: after the banner is closed and the page is refreshed, allow or disallow the banner’s display.
Customization: access the closure cross options.
Border Roundness: choose the size of the roundness.
Closure Cross Color: define the color of the closure cross.
Closure Cross Background Color: choose the background color of the closure cross.
Closure Cross Background Color (hover): select the background color of the closure cross when hovered over by visitors.
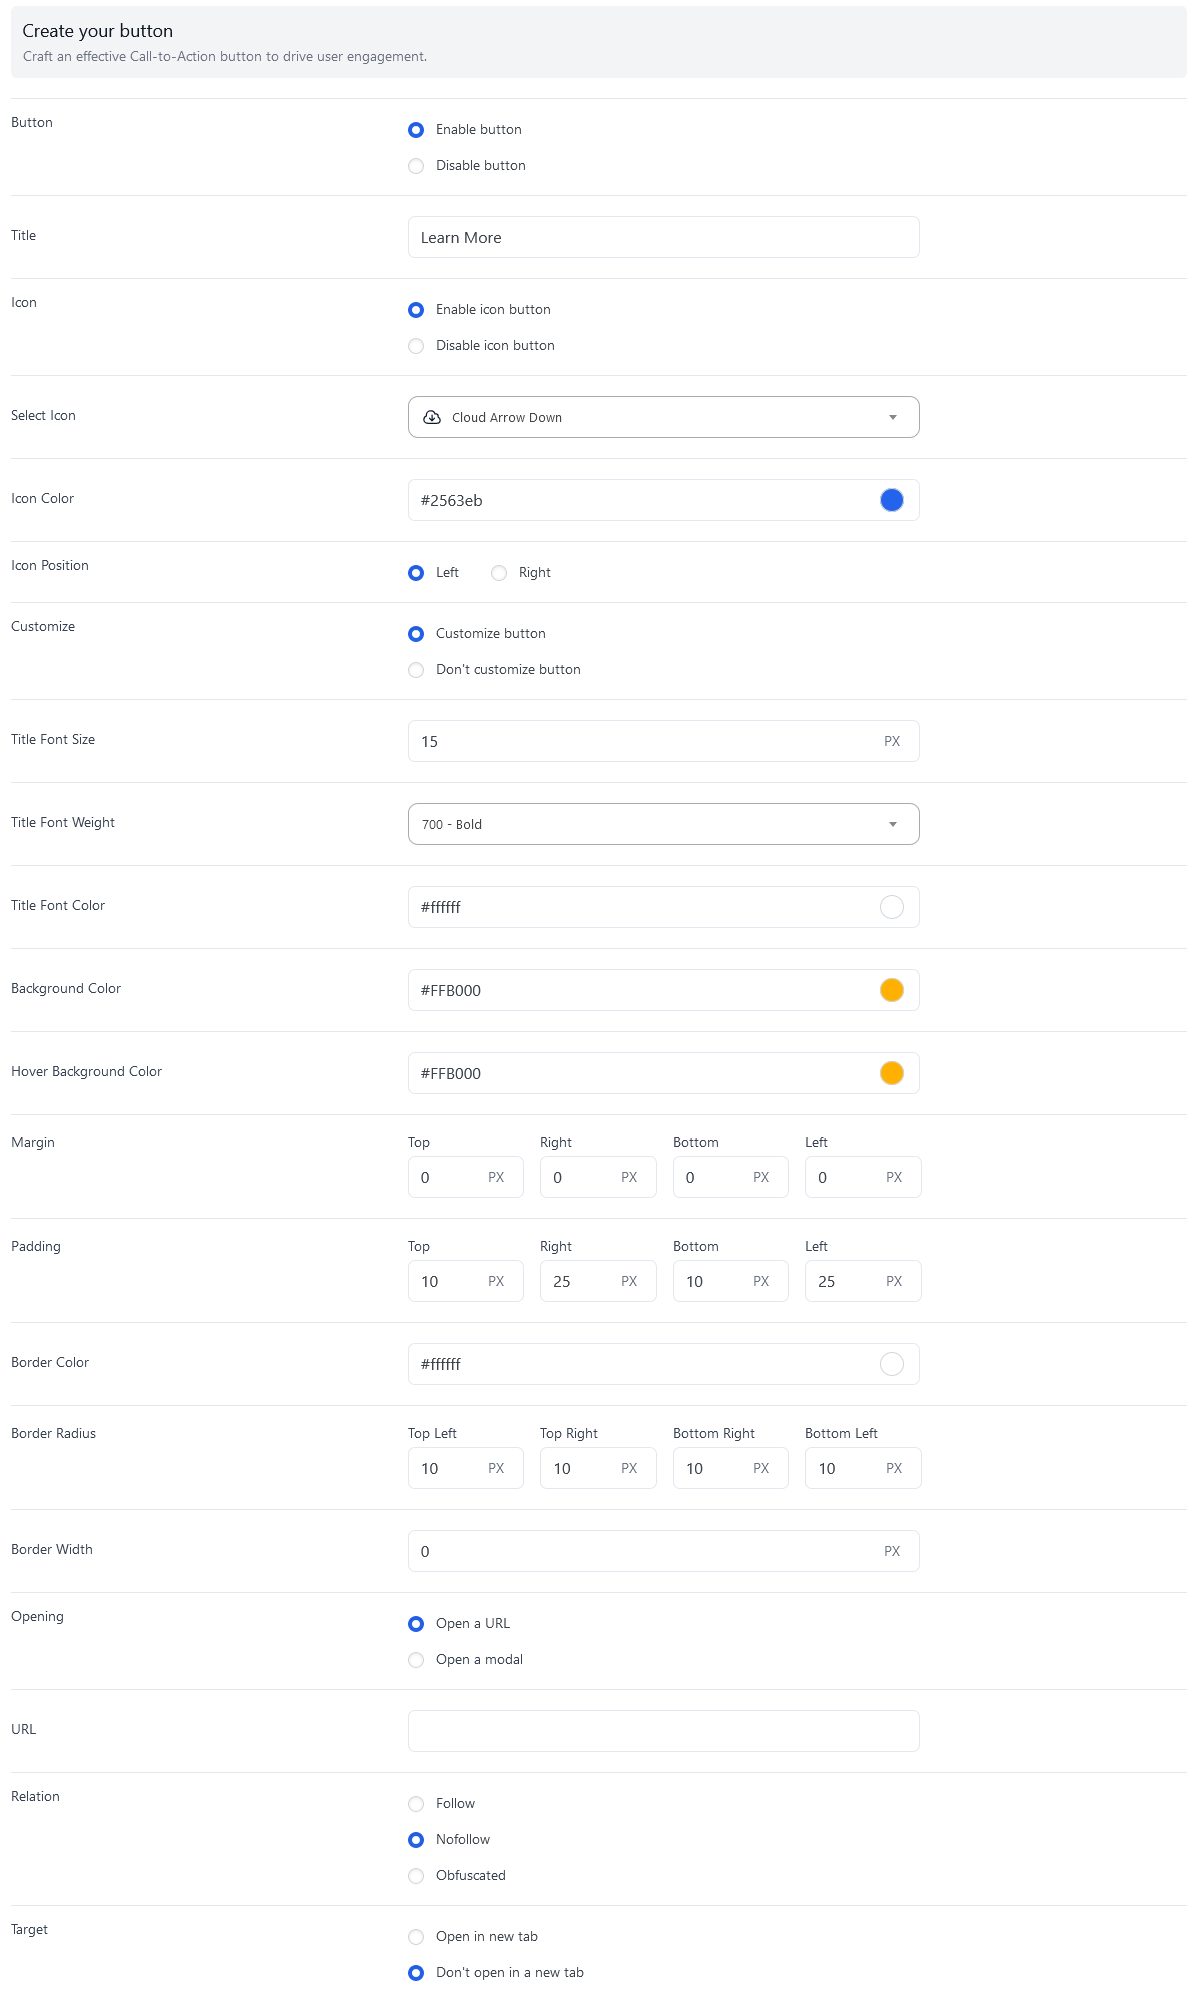
Create Your Main Button
The essential element is the main button, also known as Call to Action (CTA).
This is the button that visitors click to be redirected to your offers or services. It must attract attention, usually using catchy colors.
The available options are as follows:
Enable or Disable the Button: choose to activate or deactivate the button.
Customization of the Title: modify the text of the button.
Enable or Disable Icon: decide to display or hide an icon in the button.
Choice of Icon: select an icon from a free library.
Icon Color: determine the color of the icon.
Icon Position: choose between left or right of the button title.
Customize: enable or disable advanced customization of the button.
Title Size: adjust the size of the title.
Title Thickness: control the thickness of the title.
Title Color: choose the color of the title.
Background Color: select the color of the button.
Background Color (hover): define the color of the button when hovered over by visitors.
Margins: modify the margins.
Inner Margins: adjust the inner margins.
Border Color: choose the color of the border.
Border Roundness: set the size of the border roundness.
Border Thickness: choose the thickness of the border.
Opening: when visitors click on the button, you can redirect them to a URL or open a popup.
Open a Popup: displays a popup when the visitor clicks on the button. More information on configuring the popup here.
Open a URL: redirects the visitor to a URL.
URL: indicate the URL to which the visitor should be redirected (internal or external).
Relationship: choose among 3 options:
- Follow: dofollow link (classic link).
- Nofollow: link not followed by search engines.
- Obfuscated: link hidden from the user and search engines.
Target: decide to open the URL in the same tab or a new tab.
Manage Display
This section allows you to display your banner precisely according to your needs:
- Display the banner on a page: select one or more pages where your banner should appear.
- Display the banner on an article: choose one or more articles where your banner should appear.
- Display the banner on an article related to a tag: select one or more tag pages where your banner should appear.
- Display the banner on an article related to a category: choose one or more category pages where your banner should appear.
- Display the banner on a tag: select one or more tags where your banner should appear.
- Display the banner on a category: choose one or more categories where your banner should appear.
- Display the banner on a taxonomy: select one or more taxonomies where your banner should appear.
- Exclusions: allows excluding the display of the banner on one or more IDs.

Miscellaneous
Here, you have the option, through Omission of a Role from Statistics, to prevent counting in your statistics a person who has access to your site’s administration and who could skew the statistics of your banners.

Next Step: Create an A/B Testing Campaign.
